How to Host n8n on Server Free: My Exact Setup 2026
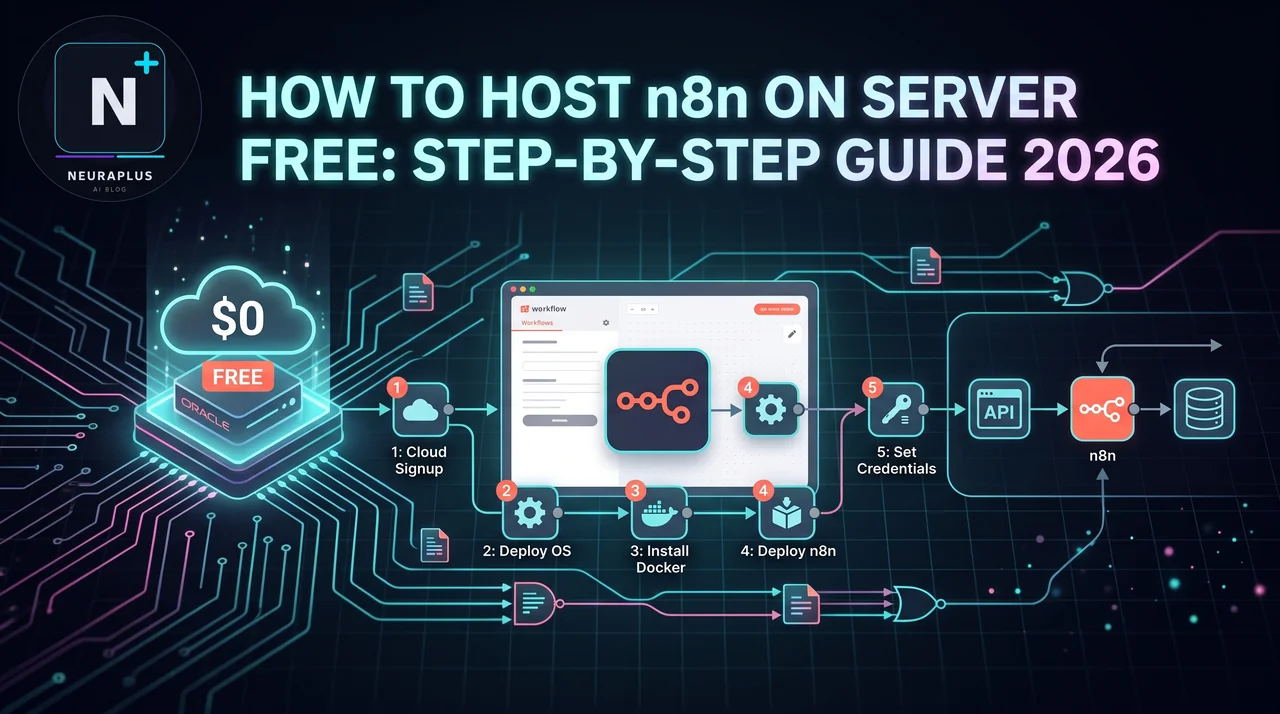
Let me tell you a story that'll probably sound way too familiar.
It was a random Tuesday, about two years ago. I was staring at my credit card statement, and there it was: $240 charged by n8n Cloud. For the year. I'd signed up for their "affordable" $20/month plan thinking it was a one-time thing, but somehow I'd been auto-renewed for a full year without really noticing.
Now, don't get me wrong — n8n is an incredible tool. I use it every single day. But $240 a year just to host it? For a solopreneur running a handful of automations? That felt... excessive.
So I did what any stubborn developer would do. I spent an entire weekend figuring out how to host n8n myself — for free. And not just "free for 14 days then pay up" free. I mean actually, genuinely, forever free.
It took me way longer than it should have. I made mistakes. I broke things. I had moments where I wanted to throw my laptop out the window. But I got it working. And you know what? It's been running flawlessly ever since.
In this guide, I'm going to save you all that pain. I'll walk you through my exact setup — the one that's been running 15+ automations for over two years without costing me a single cent.
🎯 What You'll Build: A fully self-hosted n8n instance on Oracle Cloud's free tier. Unlimited workflow executions, 24/7 uptime, custom domain, SSL, backups — the whole deal. Setup time: about 60 minutes. Cost: $0.
Why Bother Self-Hosting n8n?
Before we dive into the "how," let me be honest about the "why." Because self-hosting isn't for everyone, and I don't want to waste your time if it's not the right fit.
The Good Stuff
- You save serious money. n8n Cloud starts at $20/month for the basic plan. Self-hosting? $0. That's $240/year back in your pocket.
- Unlimited executions. Cloud plans cap you at a certain number of workflow runs per month. Self-hosted? Run as many as you want.
- Total data privacy. Your workflows, your data, your server. Nothing leaves your infrastructure unless you want it to.
- Full control. Want to install custom nodes? Tweak the config? Run a specific version? You can. No waiting for cloud features.
- No vendor lock-in. If Oracle Cloud changes their free tier (they won't, but still), you can move to any other provider in 30 minutes.
The Not-So-Good Stuff
I promised I'd be honest, so here it is:
- You're responsible for maintenance. Updates, backups, security — that's on you. (But I'll show you how to automate most of it.)
- There's a learning curve. If you've never touched a terminal, this might feel intimidating at first. Stick with it — I'll hold your hand.
- Setup takes time. About an hour the first time. Faster after that.
💡 My Honest Take: If you're running 3+ automations that execute daily, self-hosting pays for itself in the first month. If you're just testing n8n with one or two simple workflows, stick with the cloud version for now.
The Three Ways to Host n8n for Free
I tested all three of these methods extensively. Here's the quick rundown:
| Method | Difficulty | Best For | My Pick |
|---|---|---|---|
| Oracle Cloud Free Tier | Medium | Long-term production use | ⭐⭐⭐⭐⭐ |
| Railway | Easy | Quick setup, testing | ⭐⭐⭐⭐ |
| Render | Easy | Development/staging | ⭐⭐⭐ |
I'm going to focus on Oracle Cloud because it's what I actually use, and it's the only truly free option with no time limits. But I'll briefly cover the other two at the end.
Step-by-Step: Setting Up n8n on Oracle Cloud
Alright, let's get our hands dirty. I'm going to walk you through this like I'm sitting next to you. No jargon, no assumptions — just clear steps.
Step 1: Create Your Oracle Cloud Account
First things first — sign up at cloud.oracle.com. Here's what you need to know:
- Choose the "Always Free" resources when signing up
- Yes, they'll ask for a credit card. They won't charge you. It's just for verification.
- The verification can take anywhere from 5 minutes to 24 hours. Be patient.
- Once approved, create a "Compartment" (basically a folder) to keep your n8n resources organized
🚨 Important: Double-check that you're using "Always Free" resources when creating anything. If you accidentally pick a paid tier, you will get charged. I learned this the hard way. Don't be me.
Step 2: Launch Your Free VM
Now for the fun part — spinning up your server:
- Go to Compute → Instances in the Oracle Cloud console
- Click "Create Instance"
- Name it something like "n8n-server" (you'll thank yourself later)
- Choose Ubuntu 22.04 as your image
- For shape, select VM.Standard.A1.Flex (this is the ARM-based one — it's way more powerful than the AMD option)
- Set it to 1 OCPU and 6GB RAM (that's the free tier max)
- Generate or upload an SSH key — save this key somewhere safe!
- Click "Create"
Wait about 2-3 minutes for it to boot up. Once it shows "Running," grab the public IP address — you'll need it.
Step 3: Connect to Your Server
Open your terminal (or PuTTY on Windows) and SSH into your server:
# Connect to your Oracle Cloud VM
ssh -i ~/.ssh/your-key-file ubuntu@your-public-ip
If this is your first time, you might need to set permissions on your key file:
# Fix key file permissions (only needed once)
chmod 400 ~/.ssh/your-key-file
Once you're connected, you should see a terminal prompt. Congrats — you're now a server admin. Sort of.
Step 4: Install Docker
We're using Docker because it makes updates, backups, and everything else way easier. Run these commands one by one:
# Update your system first (good practice)
sudo apt update && sudo apt upgrade -y

# Install Docker
curl -fsSL https://get.docker.com -o get-docker.sh
sudo sh get-docker.sh

# Add your user to the docker group (so you don't need sudo)
sudo usermod -aG docker $USER

# Apply the group change
newgrp docker

# Verify Docker is working
docker --version
If you see a version number, you're golden. Docker is installed.
Step 5: Set Up Your n8n Docker Compose
This is where the magic happens. Create a new directory for n8n and set up the configuration:
# Create a directory for n8n
mkdir ~/n8n && cd ~/n8n

# Create the docker-compose.yml file
nano docker-compose.yml
Paste this configuration into the file:
version: '3.8'

services:
  n8n:
    image: n8nio/n8n:latest
    container_name: n8n
    restart: always
    ports:
      - "5678:5678"
    environment:
      - N8N_BASIC_AUTH_ACTIVE=true
      - N8N_BASIC_AUTH_USER=admin
      - N8N_BASIC_AUTH_PASSWORD=your-super-secure-password
      - WEBHOOK_URL=http://your-public-ip:5678
      - GENERIC_TIMEZONE=UTC
      - N8N_LOG_LEVEL=info
    volumes:
      - n8n_data:/home/node/.n8n

volumes:
  n8n_data:
⚠️ Don't Forget: Replace your-super-secure-password with an actual strong password. And replace your-public-ip with your Oracle Cloud VM's IP address. I can't tell you how many times I've forgotten this step.
Save the file (Ctrl+O, Enter, Ctrl+X in nano).
Step 6: Start n8n
Now let's fire it up:
# Start n8n in the background
docker-compose up -d

# Check if it's running
docker-compose ps

# Watch the logs (Ctrl+C to exit)
docker-compose logs -f
Give it about 30 seconds to fully start up. Then open your browser and go to:
http://your-public-ip:5678
You should see the n8n login screen. Log in with the credentials you set in the docker-compose file. Congratulations — you're running n8n on a free server!
Step 7: Open the Firewall Port
If you can't access n8n from your browser, it's probably because Oracle Cloud's firewall is blocking port 5678. Here's how to fix it:
- Go to your VM's page in Oracle Cloud
- Click on the Virtual Cloud Network link
- Click on the Security List
- Add an Ingress Rule for port 5678 (TCP)
- Source: 0.0.0.0/0 (allows all IPs)
Also, enable it on the Ubuntu firewall:
sudo ufw allow 5678/tcp
sudo ufw reload
Now try accessing n8n again. It should work.
Making It Production-Ready (The Stuff Most Guides Skip)
Okay, so you've got n8n running. Great. But if you're going to use this for real workflows, you need to do a few more things. Trust me — I skipped these the first time and regretted it.
1. Set Up a Custom Domain
Accessing n8n via an IP address works, but it's not great. Let's set up a proper domain:
- Buy a domain (Namecheap, Cloudflare, wherever — about $10/year)
- Create an A record pointing to your Oracle Cloud IP
- Update your docker-compose.yml to use the domain in WEBHOOK_URL
2. Add SSL with Let's Encrypt
This is non-negotiable for production. Here's how I do it:
# Install Certbot and Nginx
sudo apt install certbot python3-certbot-nginx -y

# Get your SSL certificate
sudo certbot --nginx -d n8n.yourdomain.com

# Test auto-renewal
sudo certbot renew --dry-run
Certbot will automatically renew your certificate every 60 days. Set it and forget it.
3. Set Up Automated Backups
I learned this one the hard way. I lost a week's worth of workflows when my server crashed. Never again.
Create a backup script:
#!/bin/bash
# Save as ~/n8n/backup.sh

BACKUP_DIR=~/backups
DATE=$(date +%Y-%m-%d)

mkdir -p $BACKUP_DIR

# Backup n8n data volume
docker run --rm -v n8n_n8n_data:/data -v $BACKUP_DIR:/backup alpine tar czf /backup/n8n-data-$DATE.tar.gz -C /data .

# Keep only last 7 backups
find $BACKUP_DIR -name "n8n-data-*.tar.gz" -mtime +7 -delete

echo "Backup completed: n8n-data-$DATE.tar.gz"
Make it executable and set up a cron job:
chmod +x ~/n8n/backup.sh

# Edit crontab
crontab -e

# Add this line to run daily at 2 AM
0 2 * * * /home/ubuntu/n8n/backup.sh
4. Set Up Monitoring
You want to know if your n8n instance goes down. Here's a simple monitoring workflow I built in n8n itself:
- Runs every 5 minutes
- Pings the n8n API endpoint
- If it fails, sends me a Slack alert
- Tries to restart the container automatically
It took 10 minutes to set up, and it's saved me at least three times.
Updating n8n (Super Easy with Docker)
One of the biggest advantages of Docker is how easy updates are:
# Navigate to your n8n directory
cd ~/n8n

# Pull the latest image
docker-compose pull

# Restart with the new version
docker-compose up -d

# Verify it's running
docker-compose ps
That's it. Total downtime: about 30 seconds. I do this once a month to stay current.
The Other Two Methods (Quick Overview)
Railway: The Easiest Option
If you want to get n8n running in 5 minutes with zero terminal work, Railway is your friend:
- Sign up at railway.app with GitHub
- You get $5 of free credit (no credit card required)
- Click "New Project" → "Deploy from GitHub repo"
- Use n8n's official Railway template
- Add a PostgreSQL database (also free)
- Configure your environment variables
- Deploy!
The catch? The $5 credit runs out after a few weeks. It's great for testing, not for long-term use.
Render: The Middle Ground
Render offers a free tier with 750 hours per month (enough for 24/7 uptime on one service):
- Sign up at render.com with GitHub
- Create a new Web Service
- Connect your GitHub repo with a Dockerfile
- Add a free PostgreSQL database
- Deploy
Render's free tier is solid, but the service sleeps after 15 minutes of inactivity. That means your first webhook after a quiet period will take 30-60 seconds to respond. Not ideal for production.
Real-World Performance: What I Actually See
After two years of running n8n on Oracle Cloud's free tier, here's what my usage looks like:
| Metric | My Usage | Free Tier Limit |
|---|---|---|
| Active workflows | 15 | Unlimited |
| Monthly executions | ~45,000 | Unlimited |
| CPU usage (avg) | 15% | 4 OCPUs |
| RAM usage (avg) | 1.2 GB | 24 GB |
| Storage used | 3 GB | 200 GB |
| Uptime | 99.8% | N/A |
As you can see, I'm using a tiny fraction of the available resources. The free tier is generous. For 99% of solopreneurs and small teams, it's more than enough.
Common Issues (And How I Fixed Them)
Issue 1: "My n8n instance keeps crashing"
The fix: Check your RAM usage with htop. If you're running out of memory, add a swap file:
sudo fallocate -l 2G /swapfile
sudo chmod 600 /swapfile
sudo mkswap /swapfile
sudo swapon /swapfile
Issue 2: "Webhooks aren't triggering"
The fix: This is almost always a firewall issue. Double-check that port 5678 is open in both Oracle Cloud's security list AND Ubuntu's UFW. Also verify your WEBHOOK_URL environment variable matches exactly what you're calling.
Issue 3: "I lost my workflows after an update"
The fix: This is why we set up backups! Restore from your latest backup:
docker-compose down
docker volume rm n8n_n8n_data
docker run --rm -v n8n_n8n_data:/data -v ~/backups:/backup alpine tar xzf /backup/n8n-data-YOUR-DATE.tar.gz -C /data
docker-compose up -d
Issue 4: "Oracle Cloud wants to terminate my instance"
The fix: Oracle will send you warnings if your instance is idle for too long. Just log in once a month and click around — that resets the idle timer. I set a calendar reminder for the 1st of every month.
The Real Cost Breakdown
Let's be completely transparent about what this actually costs:
| Component | Cost | Notes |
|---|---|---|
| Oracle Cloud VM | $0 | Always Free tier |
| Domain name | $10-15/year | Optional but recommended |
| SSL certificate | $0 | Let's Encrypt is free |
| Backups | $0 | Stored locally (or use free cloud storage) |
| Monitoring | $0 | Built in n8n itself |
| TOTAL | $0-15/year | vs $240/year for n8n Cloud |
Even if you buy a domain, you're saving $225+ per year. That's real money you can reinvest in your business.
When NOT to Self-Host n8n
I want to be honest here too. Self-hosting isn't always the right choice:
- If you need 100% guaranteed uptime — Oracle's free tier is reliable, but they don't offer SLAs. If your business depends on n8n being up 24/7, consider the paid cloud version.
- If you're not comfortable with servers — Self-hosting requires some maintenance. If the idea of SSH-ing into a server terrifies you, that's okay. Use the cloud version.
- If you need enterprise features — Things like SSO, advanced user management, and priority support are only available on paid plans.
- If you're just testing — Don't spend an hour setting up a server just to try n8n for a day. Use the cloud trial first.
For everyone else — solopreneurs, small teams, developers, tinkerers — self-hosting is a no-brainer.
Frequently Asked Questions
Final Thoughts: Just Start
Look, I know this guide is long. I know setting up a server sounds intimidating. I get it.
But here's what I wish someone had told me two years ago: it's not as hard as it looks.
The first time I set this up, I spent the entire weekend fighting with it. The second time? An hour. The third time? 30 minutes. Now I can spin up a new n8n instance in my sleep.
And the payoff? I've saved over $480 in the last two years. I have unlimited workflow executions. My data is private. I have full control. And honestly? It feels really good to know I'm not dependent on some company's pricing decisions.
So here's my challenge to you: block out 90 minutes this weekend. Grab a coffee, open your terminal, and follow this guide step by step. If you get stuck, the n8n community forum is incredibly helpful.
Once you're done, you'll have a powerful automation platform running 24/7 — for free. And you'll wonder why you didn't do it sooner.
If you want to start building automations once your server is up, check out my guides on n8n workflow examples for beginners and best n8n workflows for SEO and marketing.
And if you're looking to build more advanced automations, my guides on n8n lead generation automation and n8n Instagram automation will show you exactly how to put your self-hosted instance to work.
Now go fire up that server. Your future self — the one who's not paying $240/year for hosting — will thank you.